 My
little metal shop. A buddy of mine bought this with me last spring. This
summer he moved back to New Joisey and left me with the whole shop. It's
just and old Sinclair station with a nice fenced blacktopped parking lot
and a couple of bays
My
little metal shop. A buddy of mine bought this with me last spring. This
summer he moved back to New Joisey and left me with the whole shop. It's
just and old Sinclair station with a nice fenced blacktopped parking lot
and a couple of bays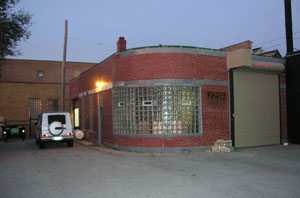
I just use it as a metal shop and a place to store my motorbike and work truck.
On this particular weekend, my good friend Gil drove over (from Michigan) to have a day in the shop. He brought over some nice tool steel and we set about turning it into Framing chisels to take to Tillers (also in Michigan) next time they do a barn raising. Here's what transpired. (Or rather, here's what we photographed of that which transpired.)

My job was the heating and pounding of steel. Fortunately, turning a bar of tool steel into a framing chisel is 99% tang creation, and 1% surfacing to make it look like it was hand forged. We made a spring swage to help neck down the steel before forming the hefty tang that would hold an equally hefty chisel handle.
Since the chisels are destined to be struck with a mallet, we decided on making bolsters out of 3/16ths x 1 inch flat mild steel. The bolsters would be punched hot with a square punch, so we had to make the right sized punch to fit our tangs. We marked the raw stock so we could punch six holes then cut each off the bar using a cutoff hardie tool. After the bolsters were separated they took another heat and we pounded them down tight onto the tang.

Here Gil uses files to clean up the bolsters. Since we'll be fitting the handles to each chisel individually, uniformity is not so important, but a nice finish makes all the difference.

Next, the bevel is ground using what would appear to be a tailed apprentice, but is actually a grinder which harnesses the power of one thousand two hundred fifty two squirrels. Each squirrel is fed daily, and treated to a massage and aroma therapy. No squirrels were harmed in the making of these chisels.

Back to the forge to heat treat the steel. The working end of the tool is tempered to a medium straw color. Gil is quenching in peanut oil which has a high flash temp, and a delightful nutty smell.

Now to test the edge. We made a quicky handle from an oak dowel so we could test the heat treatment. A deep mortise in cherry had no effect on the cutting edge.
 The
final product of most of a full day's work. The wider chisels are 1 1/2
inches, the narrower size is 1 inch. The steel still needs to be cleaned
up to whatever level of bling ("fancyness", Jeff) the user will
want. I beveled or chamfered the top edges of the tools with different
planishing hammers to slightly dress up their appearance. I like the look
of the hammered finish after it's been buffed lightly on a felt wheel
with rouge. This shines up the high spots and leaves a nice contrast with
the dimpled steel.
The
final product of most of a full day's work. The wider chisels are 1 1/2
inches, the narrower size is 1 inch. The steel still needs to be cleaned
up to whatever level of bling ("fancyness", Jeff) the user will
want. I beveled or chamfered the top edges of the tools with different
planishing hammers to slightly dress up their appearance. I like the look
of the hammered finish after it's been buffed lightly on a felt wheel
with rouge. This shines up the high spots and leaves a nice contrast with
the dimpled steel.
The rough looking knife on the bottom is a railroad spike twisted and hammered out slightly that needs it's blade ground to shape. (We had a few extra minutes at the end of the day.) I look forward to seeing what Gil does with this tool.

For a real challenge I may try to use some of this high carbon steel from Jim Crammond to try my hand at making a corner chisel. (bruzz, Jeff) Judging from the effort required just to make it straight, I might have to have a couple of spare strikers in the shop that day. It's always fun when the sledgehammers come off the rack!
For more shop pictures click here.
All Images and words ©WJG 2000-2011. All use in any media prohibited without the express written consent of the owner.